
Why Airtightness Testing Matters More Than Ever
Airtightness testing checks how much air leaks in or out of a building, and it tells us how good the building is at keeping air in. It plays a big part in lowering heating bills and making sure homes and commercial spaces stay cosy. It also helps meet the Part L air permeability requirements, which form part of the UK’s Building Regulations that aim to reduce fuel use and carbon emissions.
At Ratio Seven, we handle a wide range of air testing services, supporting builders, developers, architects and contractors. Even with preparation, some buildings still fail their first airtightness test. It’s more common than people think. The good news is that most issues can be fixed quickly when we know where to look and what to look for.
How Airtightness Testing Affects Energy and Comfort
When we think about how buildings stay warm, we often talk about insulation and heating systems. But airtightness has just as much effect. If there are gaps, drafts or leaks, then warm air escapes and cold air creeps in. That means heating systems have to work harder, and people pay more to stay warm.
More than helping with warmth, airtightness testing also affects ventilation. Good mechanical ventilation systems need airtight buildings to work as designed. When air leakage throws off the balance, moisture problems and poor air quality often follow.
If a building leaks more air than allowed, it will fail to meet Part L air permeability requirements. This affects Building Energy Ratings and can lead to delays, rework or failed compliance certificates. That’s why it pays to prepare well from the start and plan for success.
Why Buildings Fail Airtightness Testing
Airtightness testing isn’t about guessing. It measures where, and how much, air is escaping. While every building is different, we often see the same typical causes of test failures:
- Weak seals around windows and doors: Small gaps around frames or hinges are enough to let significant air escape.
- Service penetrations: These are places where pipes, wires or ducts pass through walls, ceilings or floors. If not sealed tightly, they can cause major leaks.
- Poor membrane installation: Vapour control layers or airtight barriers need to be joined correctly and sealed with care. One loose joint can affect the whole test.
- Bad detailing at junctions: Where walls meet ceilings or floors, it’s easy to miss small gaps. Mistakes at these junctions often get covered up during plastering or flooring, making them hard to spot without testing.
- Late planning: Tight buildings need airtight thinking from the design stage. Waiting until the plasterboard is up is far too late to fix structural seal issues.
Often, these failure points come from either skipped steps or rushed work on-site.
Airtightness Testing and Leak Detection Methods
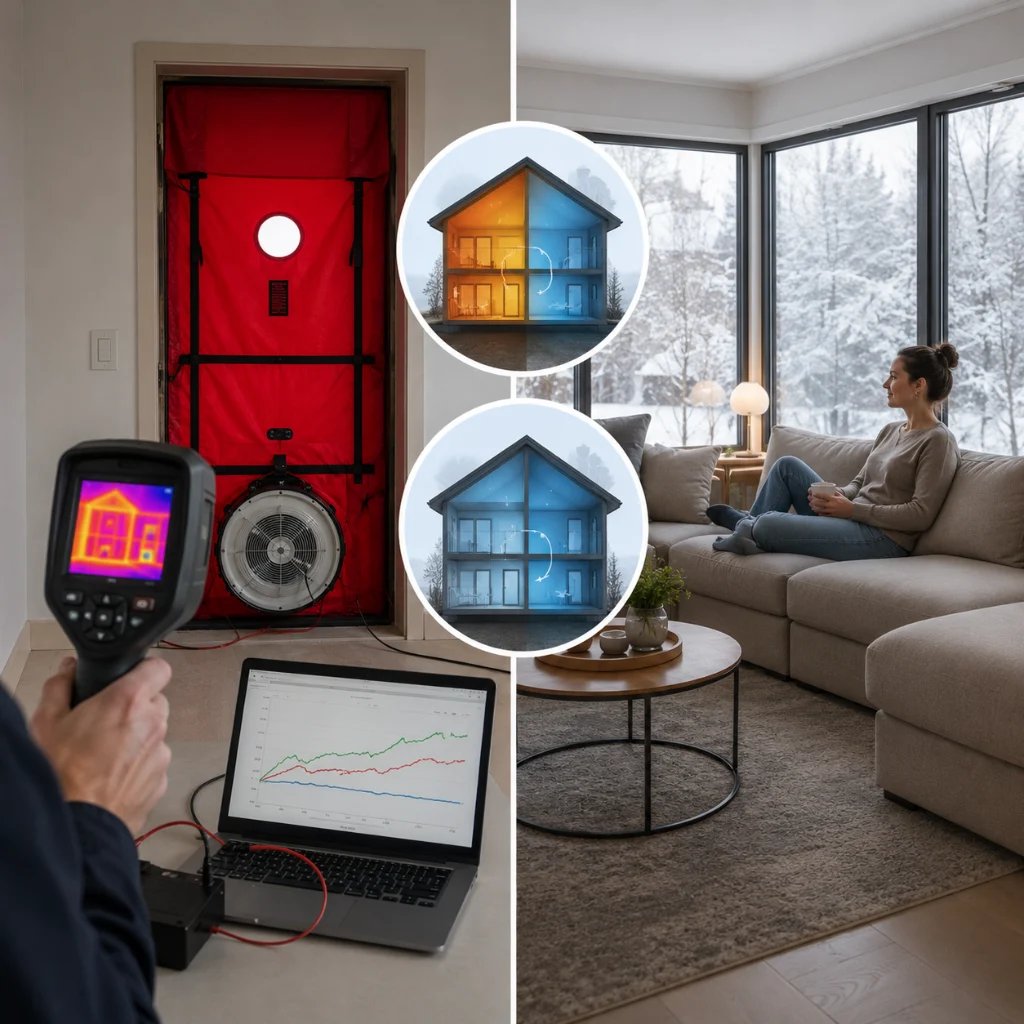
To test airtightness, we use a blower door test. This sets up a fan in an external doorway, pulling air out of the building to lower the inside pressure. Special gauges then measure how fast air moves back in through unexpected gaps.
To find the exact leak spots, we can use:
- Smoke pens: These release bits of smoke to see where draughts are flowing.
- Thermal imaging: Cameras pick out cold spots, which often point to missing insulation or unseen leaks.
Before any test, we always remind site teams to cover vents, close windows, and fill sinks with water to seal U-bends. It keeps air from escaping through open services, giving us a clearer reading.
If you’re curious about testing steps, we explain them more at our air-tightness testing and air testing FAQ pages.
Practical Fixes After a Failed Airtightness Test
The good news is, even when a building fails the test at first, it’s very often fixable. These are the key steps we suggest:
- Seal all visible gaps: Use expanding foam, airtight tape, or specialist membranes to patch holes or cracks. Electrical sockets, pipework and skim coat joints are worth checking.
- Focus on known weak points: Loft hatches, recessed lights, skirting boards and service ducts are all usual suspects.
- Get help from airtightness experts: Calling our team at Ratio Seven early can save money later. We provide support for both finding air leaks and solving them before the final test.
The best approach is to test early and often, especially during second-fix stages, where many problems can still be spotted and fixed without removing finished surfaces.
Planning for Airtight Success from the Start
To avoid trouble later, airtightness must be baked into the design and build process from day one. Following the Part L air permeability requirements is much easier when solid planning is in place.
Here’s what works best:
- Plan during design phases: Choose airtight materials and plan how they’ll join across different parts of the building.
- Give site teams the right tools and training: Clear construction drawings and product data sheets help make sure workers know what they’re sealing and how.
- Inspect as you go: Regular checks during all building stages mean issues are caught when they’re easy to put right.
Skipping these steps might speed things up early on, but covering a missed junction or misfired seal costs more to fix down the line.

Lessons from a Failed Test
Nobody likes a setback. Failing an airtightness test can feel frustrating after months of work. But in our experience, it’s also a valuable learning opportunity. Finding out where a project slipped up helps everyone improve.
After a failed test, it’s a smart move to:
- Review all leak points from the test report
- Update build methods or sequences that led to the failure
- Keep clear notes for handover teams on what to avoid next time
We’ve seen many teams aim higher than minimum requirements after learning from an initial failure. Fixing leaks doesn’t just get you a pass. It also gets you a better-performing building that saves energy for years to come.
Beyond Compliance: Building Better, Not Just Passing
Airtightness testing should not just be about scraping a passing score. Yes, it’s there to help meet Part L air permeability requirements. But more than that, airtightness means better homes and workplaces. It’s about long-term comfort and reduced bills. Less energy slipping out of buildings means better results for everyone living or working inside.
Whether you’re building a single home or managing a commercial site, having experts on your side who understand testing and construction makes a big difference. Ratio Seven works across both residential and commercial airtightness testing, with experience that helps avoid difficult retests.
FAQs
How long does an airtightness test take?
Most tests take less than 2 hours, depending on building size and prep.
Can I test before a building is finished?
Yes. Testing during work is encouraged, so leaks can be fixed before final finishes go in.
What if the test fails?
It’s quite common. Our team identifies leaks, helps fix them, and retests when you’re ready.
Is this required by law?
Yes. New builds usually need to pass airtightness tests under UK regulations, including SAP calculations.
Where can I get help with SAP scores?
You can find guidance about SAP calculations and common SAP FAQs on our site.
How can I book a professional to help me?
For expert support or general help with airtightness testing, contact us here.
Let’s Build Airtight from the Start
Airtightness testing is easy to overlook, but it plays one of the biggest roles in ensuring a building runs as it should. If you fail your test, don’t panic. Most issues are small sealing jobs, access points or bits of poor detailing that never got noticed during the early build stages.
We’ve helped teams from across the country handle retests and identify where they went off track. From advice to sealing work and diagnostics, Ratio Seven is happy to back you up at any testing stage.
Getting it right means better air quality, lower emissions, and more comfortable places to live or work. The earlier airtightness is planned into a build, the less risk of problems down the line.
Whether you’re building a small house or a large development, having airtightness experts on your side can mean the difference between fail and pass, or even better, from pass to excellent.
If you’re ready to sort out issues or want help planning for a smooth test, let’s talk. We’re easy to reach through our contact page, and we’re always here to guide you through your project.


