Understanding Building Envelope Performance and Thermal Bridging Assessment
Creating buildings that are warm in the winter, cool in summer, and long-lasting takes more than just good materials. It’s about how everything fits and works together. One key piece of the puzzle is building envelope performance. That means how well the outside parts of your home or office walls, windows, roofs and floors keep heat in or out, block moisture, and stop unwanted air from sneaking through. This one area affects comfort, energy bills, and how long the building lasts.
Within this, one clever but commonly missed detail is thermal bridging. It’s like a sneaky shortcut for heat to escape or enter where it shouldn’t. If we ignore it, buildings can waste a lot more energy than anyone predicted, no matter how well insulated the walls are.
At Ratio Seven, we’ve worked on many heat loss surveys and seen just how big a role thermal bridges can play, especially where insulation is interrupted or broken. Let’s break it all down properly so you can see why thermal bridging assessment should be part of every design plan.
What Is Thermal Bridging And Why Should We Care?
Thermal bridging happens when heat flows through parts of a building faster than it should, like through metal or concrete that carries heat much better than insulation does. These bridges are quite common, especially at junctions in the structure, such as where the wall meets the floor or roof, or around window and door frames.
These areas let heat sneak in or out, bypassing the insulation layer. Even small areas like brackets, shelf angles or brick ties can cause surprisingly high heat flow, adding up across an entire building.
If we don’t carry out a proper thermal bridging assessment, that small detail can spoil the whole performance. The losses might be hidden, but they become very real in energy bills, cold corners, or even mould and damp caused by condensation.
Where thermal bridges exist, the inside surface of walls or ceilings gets colder, meaning drops in comfort and a higher risk of water droplets forming and soaking into internal materials. That can damage plasterboard, paint, flooring and even the structure underneath.
Tools and Techniques for Effective Thermal Bridging Assessment
Watching for thermal bridges isn’t just guesswork; there are smart ways to spot them. We use a range of tools that help find, measure and calculate the true effects of thermal bridging:
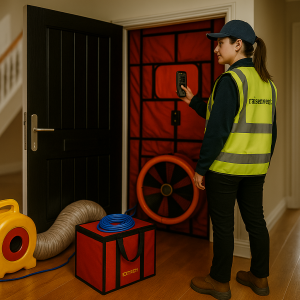
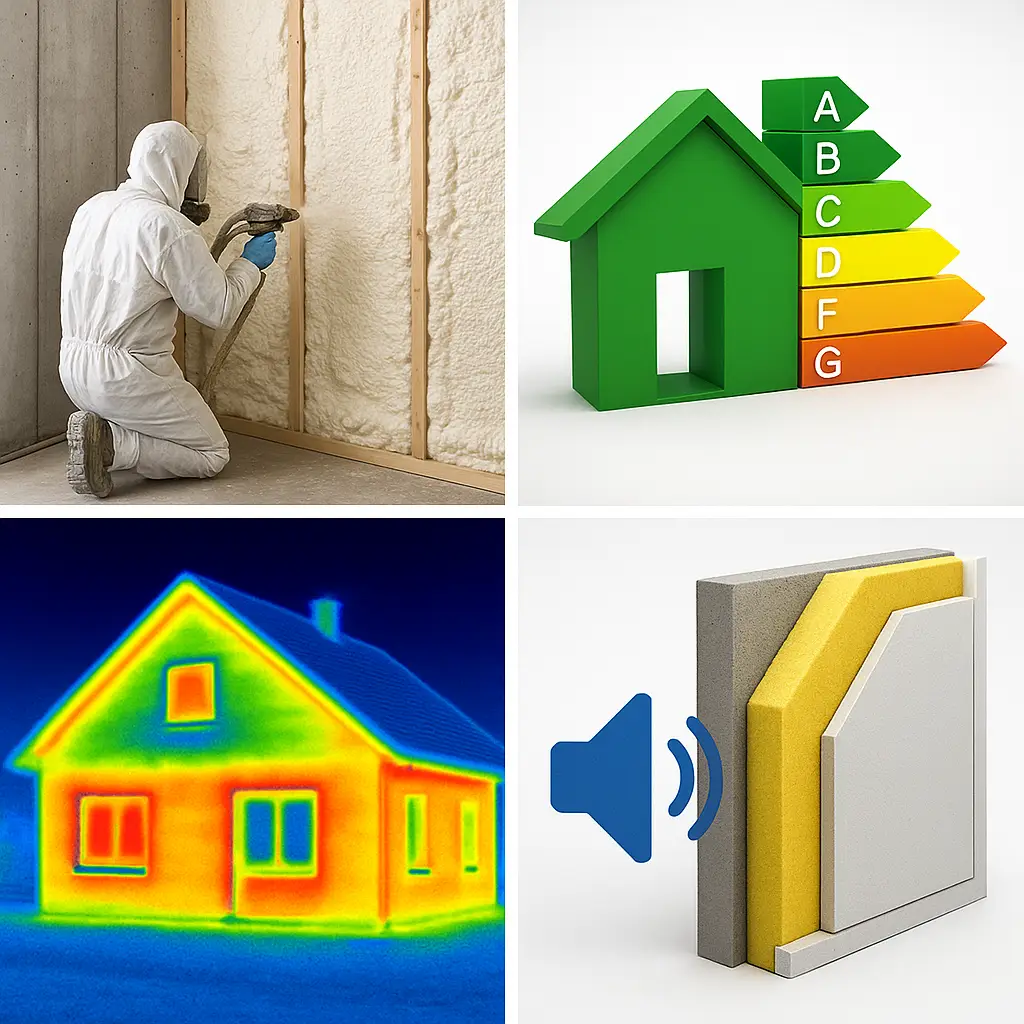
- Infrared thermography shines a light (quite literally) on cold spots by using a thermal camera. This can show clearly where heat is escaping. Check out our thermal imaging and heat loss services for more on this method.
- Heat flux sensors track how much heat is passing through a part of your building. They’re useful during surveys.
- 3D thermal modelling predicts where bridges might appear before anything is built, helping us stop them in their tracks during design.
- Visual inspections help us spot clues like regular condensation around frames or at the junction between walls and ceilings.
We always recommend using detailed modelling that includes both big areas and tiny junctions. Many builders only work with “clear field” measurements, meaning plain, flat insulated walls. But some of the biggest losses happen at break points or tricky joins. For quality results, you need both.
How Thermal Bridges Affect Building Envelope Performance
Even if you follow building regulations and use lots of insulation, thermal bridging can ruin your efforts. It’s like wearing a thick winter coat with holes around the seams. The rest of the coat is fine, but the wind still gets in.
This weakens the building envelope performance. That means higher heating costs in winter and extra cooling in summer, especially in commercial buildings or modern homes with lots of steel and glass, which conduct heat really well.
We’ve seen this first-hand in our heat loss surveys for homeowners and commercial site inspections. Just one poorly detailed window sill or roof-wall junction can spike energy use by far more than expected.
In homes and buildings designed to meet zero-energy or Passivhaus levels, ignoring thermal bridging can be the difference between success and failure. And it’s not just about energy: cold patches can lead to surface condensation and nasty window mould or rot, damaging interiors and creating health risks.
Thermal Bridging Assessment at the Design Stage
Catching thermal bridges before a single brick is laid is the best way to avoid issues. During the design phase, we work with architects, energy modellers and engineers to include thermal planning in every step.
By carrying out thermal bridging assessment at this point, we can plan smarter junctions, insert thermal breaks where needed, and choose materials that stop heat flow between components.
We often use simulations backed by thermal performance catalogues to check the details of common construction elements. These guides include values for typical wall-floor junctions, balcony details and parapets, so we get trusted data during planning, not guesswork after the fact.
Being proactive saves money over the long run and builds better structures.
Practical Design Ideas to Reduce Thermal Bridging
No one magic answer works for every building, but we can follow a set of strong ideas:
- Continuous insulation wherever possible. Avoid gaps or using steel beam supports that pass straight through it.
- Use thermally broken components like special bracket fixings or insulated window frames that prevent heat from transferring across.
- Carefully plan window reveals, doors and balconies. These areas often fail if handled in a rushed or generic way.
- Keep insulation and vapour barriers running together without letting them slip apart at curved or angled joins.
Whether dealing with a new home, a school or a large office block, taking these small steps adds up. In our draught-proofing work on older homes, we often find cold skirting boards or wall edges that show where airflow and thermal bridging were missed during retrofitting. Catching them early changes everything.
Real Life Thermal Bridging Examples

Let’s look at some typical issues we deal with in building projects:
- Masonry shelf angles that support brick cladding but are made from steel. If not insulated or designed well, they act like heat highways.
- Brick ties that link the inner and outer layers of cavity walls. If there are hundreds in a wall and they’re all metal, they build up a lot of unwanted heat flow.
- Balconies or cantilevered slabs that extend through insulated walls. Concrete conducts well, so stopping heat here needs special attention, usually with structural insulation blocks.
Luckily, simulation studies in our building-wide heat loss assessments show that design tweaks can bring these values way down without much extra cost or delay. That’s where trusted planning tools and expert advice really help.
Designing for Better Building Envelope Performance
To keep energy use down and comfort high, we always create a plan that aligns insulation, vapour control and structural needs. Too many buildings treat these things as separate checkboxes, but they work best when viewed together.
One step we always take is ensuring our projects meet or beat the latest regulations on thermal performance, but also go beyond simple U-values by including bridging details. Knowing what’s behind the average helps us meet predicted performance and avoid nasty surprises later.
We also guide clients through choosing wall types, like insulated cavity wall systems or layered timber frame solutions, where the insulation is fully continuous. Think of insulation like a blanket; if it’s got too many gaps, it doesn’t work.
FAQs
What causes most thermal bridging in homes?
Mostly, it comes from metal or concrete parts that cut through insulation, like connecting balcony supports, steel lintels over windows, or uninsulated roof edges.
Can you test for thermal bridging in an existing building?
Yes, using real-time thermal imaging surveys and heat flux testing, we can physically map colder areas and find exactly where the heat is sneaking out.
Is it worth fixing thermal bridges in older buildings?
Yes. Even small repairs or targeted insulation can stop condensation and save money. In fact, we often recommend it during draught-proofing upgrades or full refurbishments.
Who should carry out a thermal bridging assessment?
A trusted energy or building fabric specialist like Ratio Seven is ideal. We use detailed models and site testing to spot and fix thermal bridges before or after construction.
Bringing It All Together
Thermal bridging assessment is one of the smartest steps in planning a comfortable, energy-saving building. Even top-quality insulation won’t pay off if thermal paths are left unchecked. These weak links can undo everything else that went right. At Ratio Seven, we bring expert tools and insights that help you avoid hidden heat loss from the start.
Whether you’re starting a new build, retrofitting an older home, or trying to hit a low-carbon target, tackling thermal bridging early will give you better results across the board. Need help scanning your building for hidden heat trouble? Our heat loss specialists are ready to assist.
Connect with us via LinkedIn or check out real projects and solutions on Pinterest.
Let’s make your building warmer, stronger, and built to last.